In-Situ composting. Why you need it & how to do it right.

“We don’t feed the soil. We feed the life in the soil.” — Geoff Lawton
Why You Need Compost in Your Garden
There are three main reasons to compost:
- To create fertile soil
- To close the loop (and give back to the earth that which was taken from it)
- To work less
Compost to Create Fertile Soil
For every good farmer, growing food can be summed up in one word:
Soil.
Composting converts lifeless dirt into what we call “black gold.” And it does so not merely by adding nutrients to the soil, but by enhancing and cultivating microbial life.
There is an ecosystem below the ground that supports the ecosystem above ground.
The various microorganisms in the soil convert Nitrogen, Phosphorous, Potassium, and other essential elements that the plants need so they can easily use them to grow and develop.
When we artificially add N-P-K fertilizer in our garden beds, that does nothing to the plant, unless there are bacteria, fungi, etc., that can transform these nutrients to make them more “plant-digestible.”
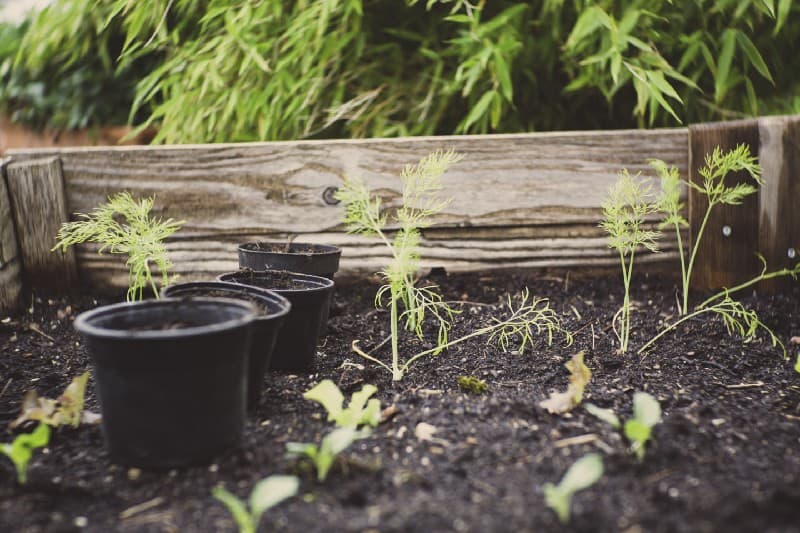
Not only that, but the macro-arthropods and earthworms that come with good compost can naturally & gently till the soil, making it less compact and more well, fluffy.
Sometimes, this fluffiness is called “tilth.”
This improved structure, + organic life, increases the soils’ capacity for holding water.
Organic matter, which is the living part of the soil, is known to hold its weight in water ten times! This water-holding capacity is something sand, clay, or just bare dirt don’t do well.
If our soil cannot:
- retain water
- provide structure and
- cultivate the microscopic life necessary to cycle minerals and nutrients for our plants to absorb,
then it washes away.
According to this Cornell study, topsoil is being lost to erosion at a rate of 10–40 times more than it can be replenished.
You and I have the power to stop this erosion through composting.
Compost to Close the Loop
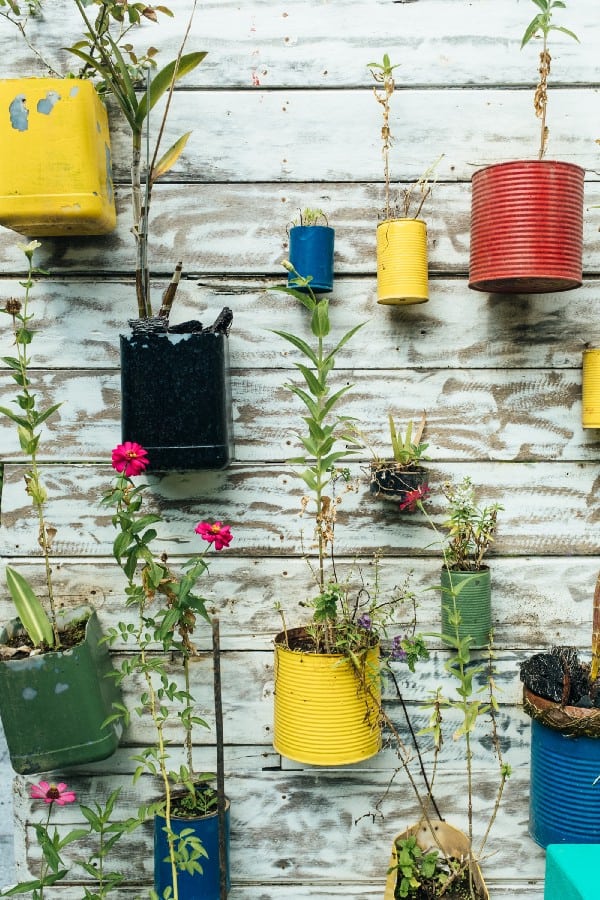
Another good reason to compost in your garden is to “close the loop” in your consumption cycle and go “zero-waste” in your garden.
If you come to think of it, composting is doing more than just going zero-waste. It’s going “negative-waste,” if one could permit the use of such a term.
It’s always good to take our cue from nature and mimic the efficient way she handles waste, which is to recycle it!
By using our waste and keeping it local, we avoid creating more carbon in the atmosphere by having the trash truck haul our garden refuse miles away.
Not only do we forgo the use of fossil fuels as a result of composting, but we also capture existing carbon into the ground where we use it to grow food! So go, “negative-waste!”
The last reason to compost, however, is sometimes the one most overlooked.
Compost to Do Less Work
“Both work & pollution are the results of incorrect design or unnatural systems.” — Bill Mollison
I live in a townhouse “village” with a landscaping company that takes care of the common areas. One day, I saw the landscapers gathering pine needles that fell under the evergreen trees in our development. The workers would gather the leaves and dump them in a truck. I do not know where they would take them, but I assume it was to the municipal dump where they would have to pay a fee to offload the pine needles there.
Do we ever stop to ask? Why do we pay people to do that?
Why, in our society, do we require manicured lawns and no leaves under trees, when that is not how things naturally grow?

There must be some physiological reason that deciduous trees shed their leaves in the fall. Perhaps the tree finds these leaves help to protect its root layers and keep it warm during the winter. Maybe the tree has found a way to conserve energy during the colder months while feeding the soil around it as the leaves slowly decompose.
If we let the leaves fall under the trees, we (and others) would do less work.
And we would also spend less money.
During the fall, my family and I eagerly await the curbside-pickup possibilities of neatly-bagged leaves just waiting for us to take them home to our compost bin.

Now for the useful part.
How to Compost (An Overview)
In general, to compost:
- Collect organic material such as kitchen scraps or garden clippings for composting. In the home, you can do this sans the flies, by having a dedicated freezable container for kitchen scraps. You can add to your scrap stash throughout the day.

2. Knowing what you have in terms of bins and space, select and study the composting method that works for you. (See below for specific techniques.)
3. Find a suitable place to store your “active” compost bin or heap. Aerobic composting methods (with air) are best done outdoors or in a garage. Anaerobic composting (sealed tight) such as bokashi can be done right below your kitchen sink. If you are keeping aerobic bins in the home, place a fly trap and some baking soda to absorb odor beside it.
4. Maintain your compost according to the method that you’ve chosen by regularly checking on it. Aerobic bins or heaps should ideally be checked daily to a few times a week for signs of rodent infestation and to maintain the oxygenation of the pile. Anaerobic setups should be minimally exposed to air and drained of fermented liquid.
5. Harvest your compost after (2) two weeks to (2) two or more years!
Composting Methods to Try
The following are a few composting methods to choose from. These options are by no means an exhaustive, but here they are in order of difficulty:
1. Indoor Composting
2. Ruth Stout Composting Style
3. Vermicompost
4. Cold Compost
5. Hot Compost
6. Bokashi
Finally, we also want to tell you why we don’t believe in general that compost tumblers are all that effective.
1. Indoor Composting
If you don’t want to bother with a full-fledged compost pile, yet wish to fertilize your indoor plants or nursery seedlings, you can do so by “top dressing” your pots with compost.
But first, be warned that this method is a bit hit or miss. Composting involves little helpers in the form of bacteria, fungi, and earthworms. If you try to add amendments but your potting soil is dead (i.e., no life), then the additives may not be absorbed by your plants.
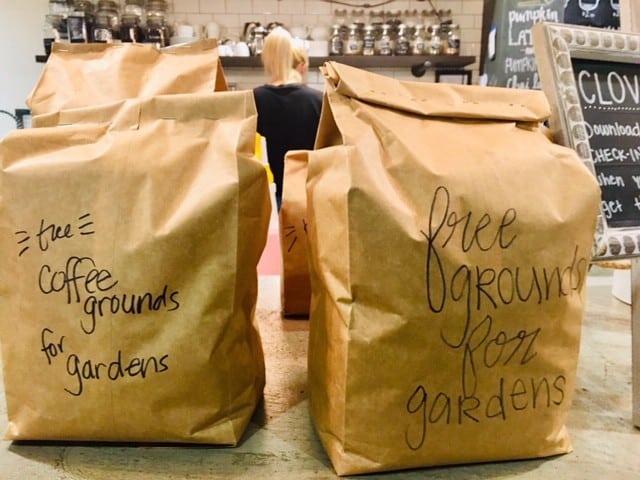
- Apply coffee grounds to your soil or water your plants with diluted coffee.
- Use pencil shavings, especially in pots where your plants are a bit soggy and smelly.
- Cut up some fast-decaying banana peels and “work them into” your pots.
- Crush up some eggshells. Blend them with some water and water your plants with this high-calcium drink.
- Plant a few peas or beans (from your pantry) in each pot. You’re not expecting to harvest the beans. Just hoping the nitrogen-fixing bacteria you introduce in the soil will have a carry-over effect on your plants of interest.
- Put the dust from sweeping your floors into the pots around your house instead of into the trash bin. Just make sure that the swept dust doesn’t include any plastic.
- Potty train your children by having them practice on indoor plants.
2. Ruth Stout’s Lazy Composting Style

Ruth Stout was a gardener and author who lived from 1884–1980. Through her work during the era of rising pesticide use, she popularized a very minimalist approach to gardening. Her writing, especially in her book, “Gardening Without Work: For the Aging, the Busy & the Indolent,” is a very practical, candid, and funny read!
“It is October, and I trust that your garden looks terrible, with dead vines, clumsy cabbage roots — refuse — all over it.
And I do hope you will leave everything there, and add the kitchen garbage to it through the winter.”
Indeed that is about all she has to say about composting! Ruth Stout did not keep a compost heap but simply stuffed all her scraps into the perennial soft mulch that covered her entire garden.
At the Permaculture Gardens homestead, we use her method for growing potatoes. I think of all famous gardeners; she is perhaps the most deserving of the title, “lazy gardening queen.”
Enjoy the video below and watch her in action at 96 years of age!
3. Vermicomposting
(Possible indoors, perfect for a deck, garage or in small spaces)
Vermicomposting, according to the Oxford dictionary, is “The use of earthworms to convert organic waste into fertilizer.”
The best-known worms for composting food scraps are red wriggler worms or Eisenia fetida.
The few studies we have found on the gut bacteria of red wriggles reveal rich and diverse microbiology! There are so many different kinds of organisms living inside the red wriggler’s gut that 18.7% are unclassified bacteria, as in this taxonomic study of the microbiome of composting worms.
Perhaps you don’t have enough room for the ideal hot composting setup (two composting areas big enough for a 5-ft tall compost pile). Then vermicomposting may work well for you!

Earthworms are amazing creatures that eat organic materials. These worms process and innoculate the material going through their guts, creating vermicasts. Vermicasts are super-charged fertilizer for annual vegetables. These worms eat up to half their body weight per day. A pound of red wrigglers could ideally process a half-pound of kitchen scraps a day into vermicasts.
A Word on the Carbon to Nitrogen (C: N) Ratio
Vermicompost bins are relatively easy to care for. Make sure you don’t add too many kitchen scraps (which tend to be nitrogens) in ratio to brown matter (shredded newspaper/cardboard, leaves, etc.). If you notice your worm bin smelling foul, the environment may be too acidic and anaerobic for your worms.
The ideal Carbon to Nitrogen ratio in most compost piles is 25–30:1.
This ratio means that there are (25) twenty-five — (30) thirty units of carbon for every (1) one part of nitrogen.
But in vermicompost bins, the ideal ratio is 25.
If this C: N ratio is difficult to fathom, you can find examples of organic material and C: N ratios in this nifty calculator. You can combine organic materials and check if the overall pile has your desired C: N range.
Below is a video in which I demonstrate how I regulate this C: N ratio in a worm bin and, consequently, the pH of the compost.
How to Make Your Own Worm Bin
You can keep a simple plastic tub for your worm composting, which you’ll need to turn over with a small trowel or pitchfork every few days.
Below is gardener, Emily Muphy’s video on making a simple worm bin. We currently keep our worms in a similar container.
There are some commercial solutions for worm composting available. The most popular ones are worm towers that involve stacking layers of plastic bins with holes on the bottom for the worms to travel up as they consume the scraps in each layer. Worm owers are very good for temporary storage during the summer months, but not good for insulating the worms in the winter.
You can collect earthworms from your garden or even build worm trenches or pits directly into your beds.
In our experience, the worm bin is the most hassle-free option.
If you have a productive “worm farm” going, you need about a pound of worms (approx. 2000).
4 & 5. Hot & Cold Composting
In cold composting, a big pile of leaves or grass clippings sits and rots over several months to several years. This process takes the least amount of work, but the results may take too long for our gardening needs.

Enter hot composting or “Berkeley method” composting. This composting process, created at the University of California-Berkeley, is one that you have to manage more intentionally. Other composting masters such as
Geoff Lawton and Elaine Ingham have refined this method to create a more complex and complete compost end product.
In a hot composting pile, the C: N ratio you would aim for would be 25–30:1.
If this seems difficult to fathom, permaculture teacher, Matt Powers, and soil scientist Elaine Ingham break it down into three piles:
· (1/3) one-third cubic meter (or seventeen 5-gallon buckets) of “browns” made of dried leaves and clippings harvested after they had “gone to seed” in the late summer or early fall.
· (1/3) one-third cubic meter (or seventeen 5-gallon buckets) of “greens,” which are green grass clippings or plant materials harvested before they had matured and “gone to seed.”
· (1/3) one-third cubic meter (or seventeen 5-gallon buckets) of manure.
The entire pile must be at least one cubic meter in Volume.

Hot composting speeds up the cold composting process to an ideal 18-days!
When creating the pile, aim to achieve a ratio of 15–20:1 carbon to nitrogen.
The nitrogen materials provide a high energy fuel created by the reproduction and digestion of mesophilic microorganisms. The overall temperature of the pile rises, causing the organic matter to decay much faster. As the pile gets turned inside out, oxygen and water help feed the microorganisms, and the temperature further increases.
At this point, thermophilic bacteria take over and speed up the rate of decomposition. As the entire pile nears its final transformation, the temperature drops, and the mesophilic bacteria take over again.
If you want to learn more about hot composting in particular, sign up for our webinar on that specific topic HERE.
What is the Best Composting Bin?
One of the most common questions about composting is, “What is the best compost bin?”
The truth is that we do not recommend buying commercial tumbler bins for hot or cold composting because most tumblers heat the compost too quickly.
We find that during the summer, these enclosed plastic bins fry the microbiology that is working to break down are food scraps and waste.

Some bins recommend frequent tumbling, so you can aerate the bins and avoid overheating. Perhaps you can achieve stable temperatures in a shady spot or in climates where it is colder during the summer.
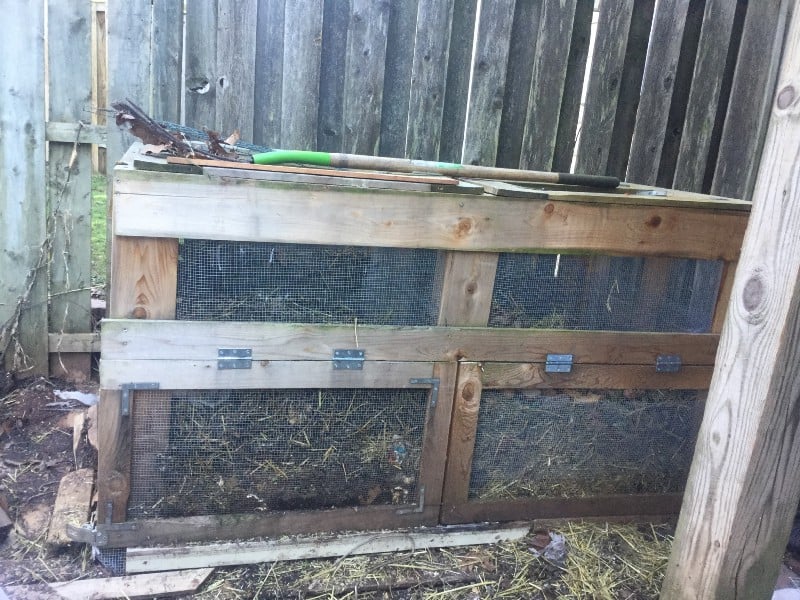
So we propose creating an open bin yourself from pallets like the photo above or enclosing a wooden crate in wire mesh to keep rodents away.
Some folks simply use round chicken wire or ventilated metal framing as a bin to keep air circulation going.
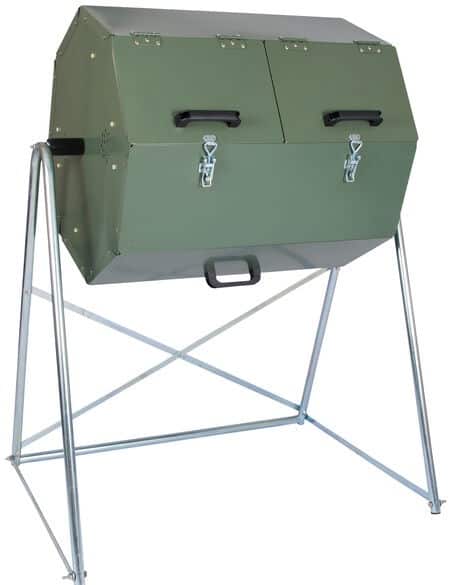
If you have purchased a compost bin and it is working well for your hot or cold compost pile, please share your experience with all of us below!
Perhaps we are wrong.
6. Bokashi
What differentiates the bokashi method from the most common types of composting is that you deliberately work with anaerobic microorganisms to “ferment” your kitchen scraps.
You throw your scraps into an air-tight bucket with some of these friendly microorganisms and ferment the scraps much like you would your sauerkraut.
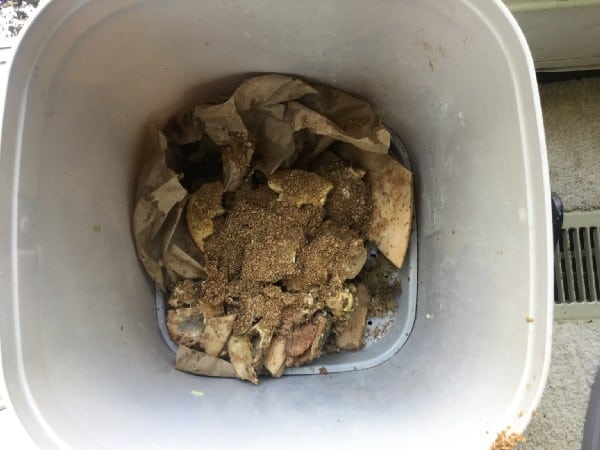
The result is a thoroughly pickled pre-compost, which you then bury in the garden (but not near your plants) to let it finish composting.
Bokashi allows you to compost much of the organic matter, which would otherwise kill your composting worms or attract rodents.
Here are some of the things that you can compost using the Bokashi method:
- Meats
- Bone
- Pasta
- Bread
- Citrus
It is good to note that you can compost anything organic!
- An old pair of leather boots
- A dead rat
- Even your humanure
As Geoff Lawton likes to say, “If it has lived, it can live again.”
However, the composting method you choose determines what type of ingredient goes into your bin.
Compost Conclusion
Now that you have several options to choose from, we hope that you will try your hand at composting (or refine your current composting skills!)
Please share your efforts: past, present, future in the comment section below.
And if you are interested in digging deeper into each one of these techniques above, Sign-up for our newsletter.
We know that if everyone did their share of composting, we would:
- eliminate waste
- live simpler, happier lives and
- grow more abundantly
Composting in nature never really ends.
But it can begin in a more intentional way
with you.
Your challenge:
- Choose one composting method above.
- Start composting intentionally today.
If you need help committing to composting, we have a handy PDF to help keep you accountable.
Click HERE to get your “Hot Composting Streak-Tracker”

